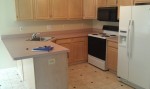
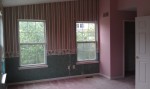
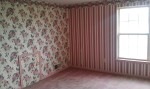
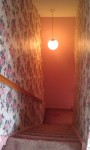
When I moved into my home in October 2011, the previous owner had lived for years with not only pink walls, pink wallpaper, pink trim, and pink carpet in 80% of the house, but also at no point in this home’s 18-year tenure did anyone attempt to replace the PINK LAMINATE kitchen counters.

That’s where I come in.
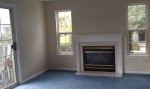
Lucky for me, the main floor of the house had virtually no pink other than that countertop. Sure, there were some hideous vinyl floors, ugly blue carpet and 18 years of cigarette smoke stain on the walls, but at least there was very little pink. Still…I HAD to get rid of it with a quickness. So, within 1 week of moving in I decided to head to my local A.C. Moore and pick up some acrylic paints, then stop off at Home Depot for some Martha Stewart specialty glazes and textured paint and some varnish/lacquer. I was on a mission.
Thanks to Pinterest and Remodelaholic I had some direction to follow before I jumped right in. My kids consider me an “artist” and I think after this project I now also consider myself one. Let me show you how I did it.
Here are the supplies that I used:
Acrylic Paints:
- 16 oz Black
- 2 oz Beige
- 2 oz Med Brown
Other Paints:
Other supplies:
- Sea sponge
- Drop cloth (you’ll REALLY want to have this)
- 1 box of High Gloss Finish/Lacquer (EnviroTex works great)
- Large plastic putty knife (to spread the lacquer)
- Disposable bowl to mix lacquer
- Painters tape
 STEP 1: I started by painting a coat of the primer on the counters. The particular primer that I used worked as a sealant as well as primer which prevented me from having to sand the pink laminate before I painted (it allowed the paint to stick better to the surface). I’m not a sander.
STEP 2: I mixed together the black acrylic paint with the Lampblack Martha Stewart textured metallic paint to use as my base coat. I figured this would give the base a bit of a glimmer to it as well as a texture. It was PERRRRFECT! I then used a paint brush to apply the black mixture to the counters, and went over the paint with the sea sponge for texture purposes.
STEP 3: This was the tricky part. It was all guessing, dabbing and blotting. I had no idea what it was going to look like, even though I had a granite sample sitting next to me as inspiration the entire time.
I took the sea sponge and ripped it into pieces. Each piece was used for a different color. I began with the medium brown color and applied liberal dabs all over the section (working in sections is a lot easier than dabbing all over the entire surface). Then I went to the lightest color, the beige. I lightly dabbed the beige in various spots, being careful not to over do it. I realized by putting it on second, I could paint right over the beige with the darker brown afterward if I screwed up, which I did.
Finally, I moved on to the bronze metallic color. And there it was, my pot of gold…er…bronze at the end of the rainbow!!! The bronze made the whole thing come together.
 But the best part is yet to come…
I took pictures after I finished dabbing my little heart out for hours, thinking “Damn this looks like a different kitchen! I might just leave it like this. Screw the lacquer.” Boy was I wrong. Lacquer = fabulous.


STEP 4: I figured why not attempt a little bit of clear coat/lacquer on the first small section I painted. Note: be sure to adhere the drop cloth/plastic before you pour the clear coat. Otherwise you will be extremely sticky and you could definitely ruin your floors and cabinets.
I mixed the lacquer according to the instructions, which it says are VERY important to follow exactly as they are written – otherwise you will end up with…well….I don’t know because I followed the instructions.
And then I poured. I used the plastic putty knife to even it out, but for the most part, the liquid is self-leveling and settled right into place where needed.

LOOK AT IT SHINE!!!
It’s difficult to see from the photo, but when the clear coat went on, all of the glitter, shimmer and gleam of the metallic paints that I used POPPED in to bright and shining view. MY counters were shining like stars, and I could see my reflection in them. Little did I know, when they dried, the shine stayed.
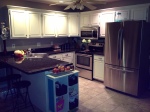
I now have beautiful, shiny, glossy, glittery, metallic-yet-classy counters! GOODBYE PINK! Here’s the final result:


Posted in
Projects and tagged
counter tops,
counters,
countertops,
DIY,
faux granite,
granite,
kitchen,
laminate,
paint,
pinterest,
redesign,
remodel,
renovation,
revamp


 (Dream Home – St. James 12mm Chimney Rock Charcoal Laminate $2.64/sq ft )
 Awww, isn’t that sweet? This guy makes the experience look so pleasant and so clean. Why the hell is he wearing a hard hat anyway – looks like a pretty simple job, right? Simple enough to wear a collared shirt and jeans at least…


